Quick Start
Getting Started
This guide walks you through signing up and getting your first meaningful monitoring coverage set up in about 10 minutes.
Step 1 — Create your account
Go to app.nob.center/signup and fill in:
- Company Name — your organization's name (3–100 characters)
- Starting Domain — the root domain you want to monitor first, e.g.
example.com - Email Address — a verification link will be sent here
- Password — minimum 8 characters
Accept the Terms of Service and click Create Account.
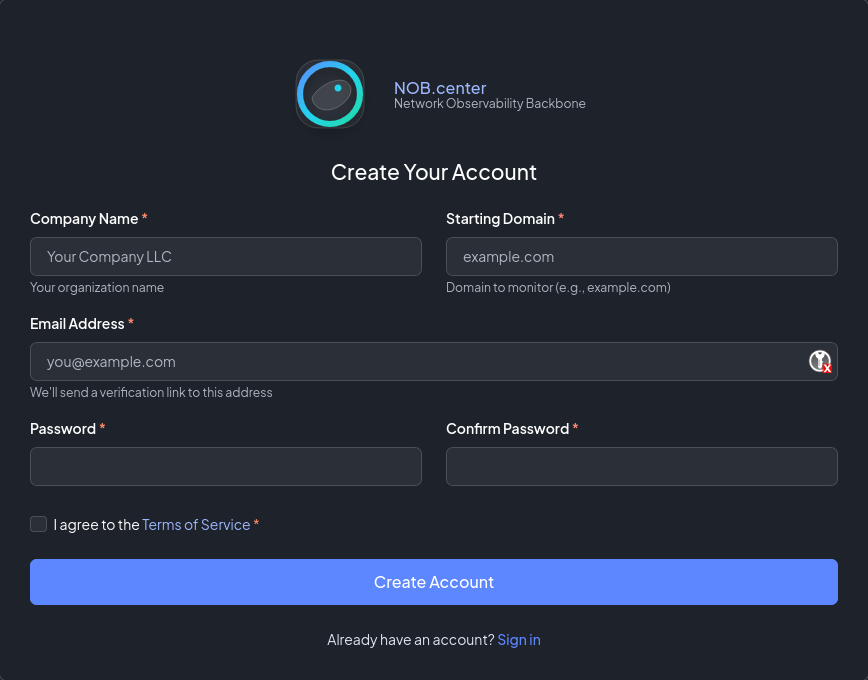
You will receive a verification email. Click the link in the email to activate your account and land on the dashboard.
Note
The starting domain you enter is used to pre-populate your first CT-Log filter (wide match for yourdomain.com). You can add more domains immediately after signup.
Step 2 — Explore the dashboard
After email verification you land on the Dashboard. On a fresh account the audit score panels will show placeholder data — they populate after your first monitoring data arrives.
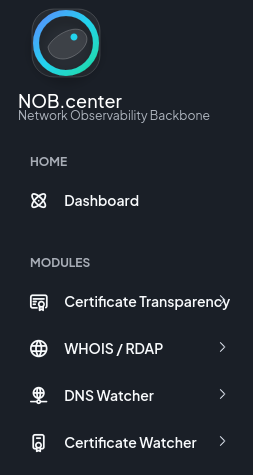
The sidebar shows the four monitoring modules. Your starting domain is already registered as a CT-Log filter — you'll see certificate matches here within hours as CT logs are tailed in real time.
Step 3 — Add CT-Log filters
Navigate to Certificate Transparency in the sidebar.
The Domain Filters table already contains a wide-match filter for your starting domain. A wide match for example.com catches certificates for example.com, www.example.com, api.example.com, and any other subdomain.
To add additional domains or refine your coverage:
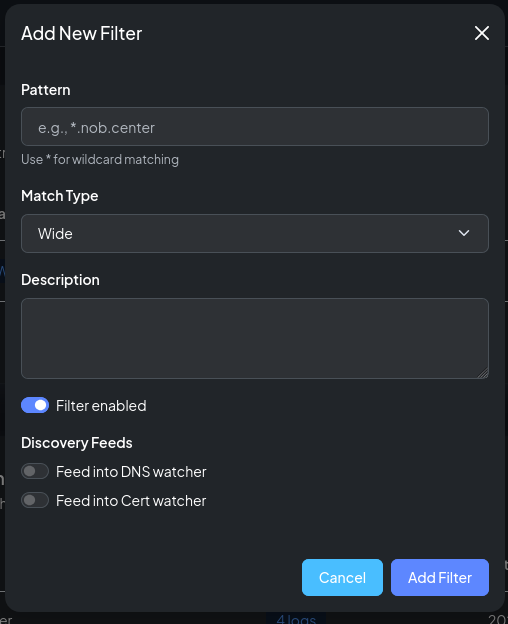
- Click Add Filter
- Enter a pattern — e.g.
*.example.comorsubsidiary.com - Choose Wide (includes all subdomains) or Exact (exact domain only)
- Optionally enable the Feed into DNS Watcher or Feed into Cert Watcher toggles to route newly-seen domains into those modules automatically
- Click Save
Tip
Use wide match for root domains you own. Use exact match when you want to track one specific hostname without catching all subdomains.
Step 4 — Set up DNS monitoring
Navigate to DNS Monitoring in the sidebar.
- Click Add Domain
- Enter a root domain, e.g.
example.com - Leave Auto-discover checked (recommended) — the system probes for common record types and suggests which ones to track
- Click Save
After saving, a modal shows the discovered records. Review the list and check the ones you want to monitor. Typical starting selections:
example.comA, MX, NS, TXTexample.comCAA (if you have a CAA record)- Key subdomains that appeared in your CT-Log feed

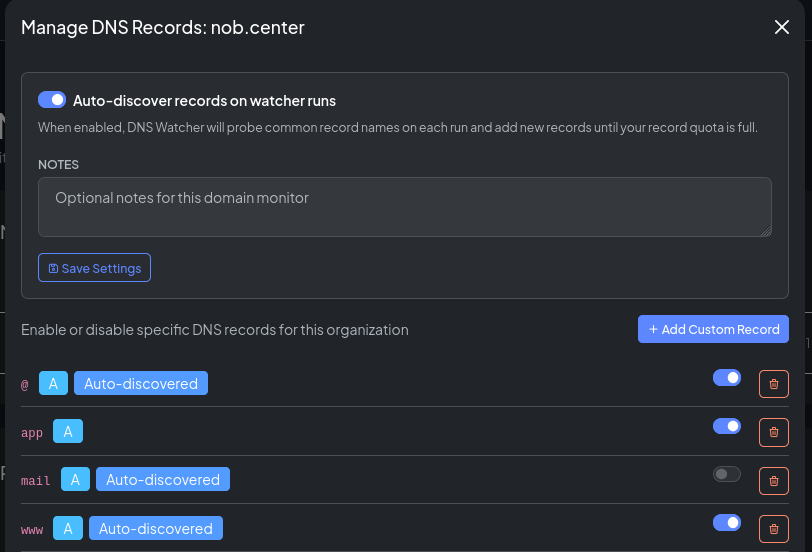
Once records are saved, DNS-Watcher begins taking snapshots on its scheduled cycle. Changes will appear in Recent DNS Changes as they are detected.
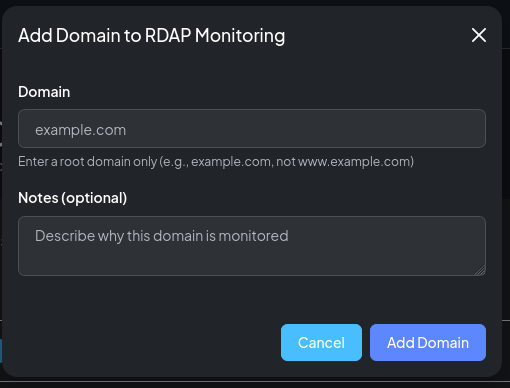
Step 5 — Add RDAP monitoring
Navigate to RDAP / WHOIS in the sidebar.
- Click Add Domain
- Enter the root domain
- Click Save
That's it — no record selection required. The scraper fetches the full RDAP record from the registry on each cycle and stores a snapshot. You can view the current snapshot and compare to previous ones using the History viewer.
Step 6 — Set up certificate deployment monitoring
Navigate to Certificate Deployment in the sidebar.
- Click Add Monitor
- Enter the Common Name — the hostname the certificate should be valid for, e.g.
www.example.com - Set the Port (default: 443)
- For automatic IP resolution: enter the hostname in Target DNS Name — the scanner will resolve it and scan all resulting IPs
- Alternatively, enter IP addresses manually under Manual IP Targets
- Click Save
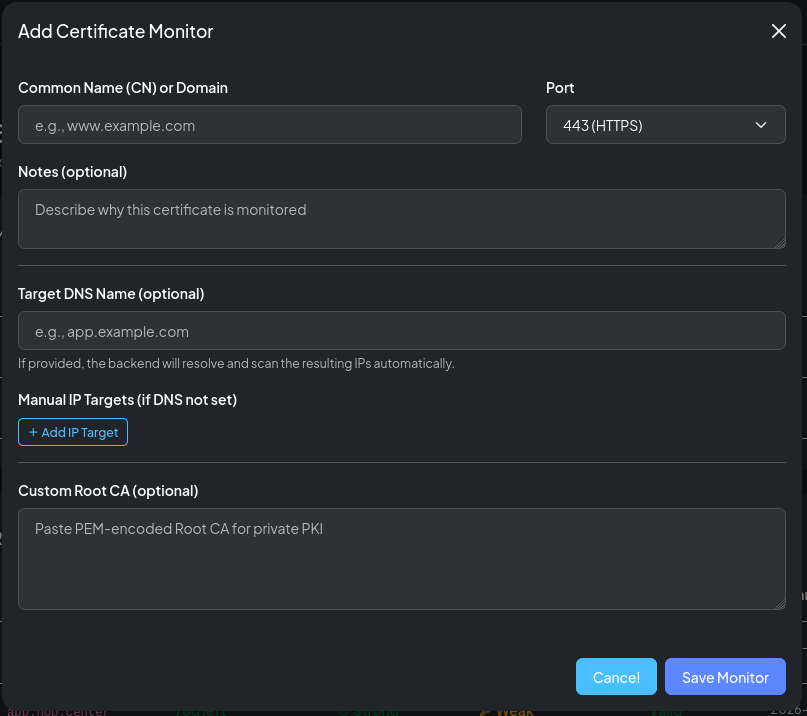
The scanner will connect to each target IP on the next scheduled cycle and store the certificate details, protocol information, and cipher suite data.
Step 7 — Create your first alert rule
Every module has its own alert rules. Start with a high-value rule: get notified when a new CT certificate is issued for your domain by an unexpected CA.
Navigate to Certificate Transparency → Alert Rules.
First, create a template
- Click New Template
- Give it a name, e.g.
Email - Security Team - Set Frequency Mode to
Immediate - Add an Email destination and enter your email address
- Click Save Template
Then, create a rule
- Click New Rule
- Name it, e.g.
Unexpected issuer - Set Severity to
High - Select the template you just created
- In the Condition editor, enter:
!cert.issuer.contains("Let's Encrypt") && !cert.issuer.contains("DigiCert")
Adjust the issuers to match your expected CAs.
- Click Save Rule
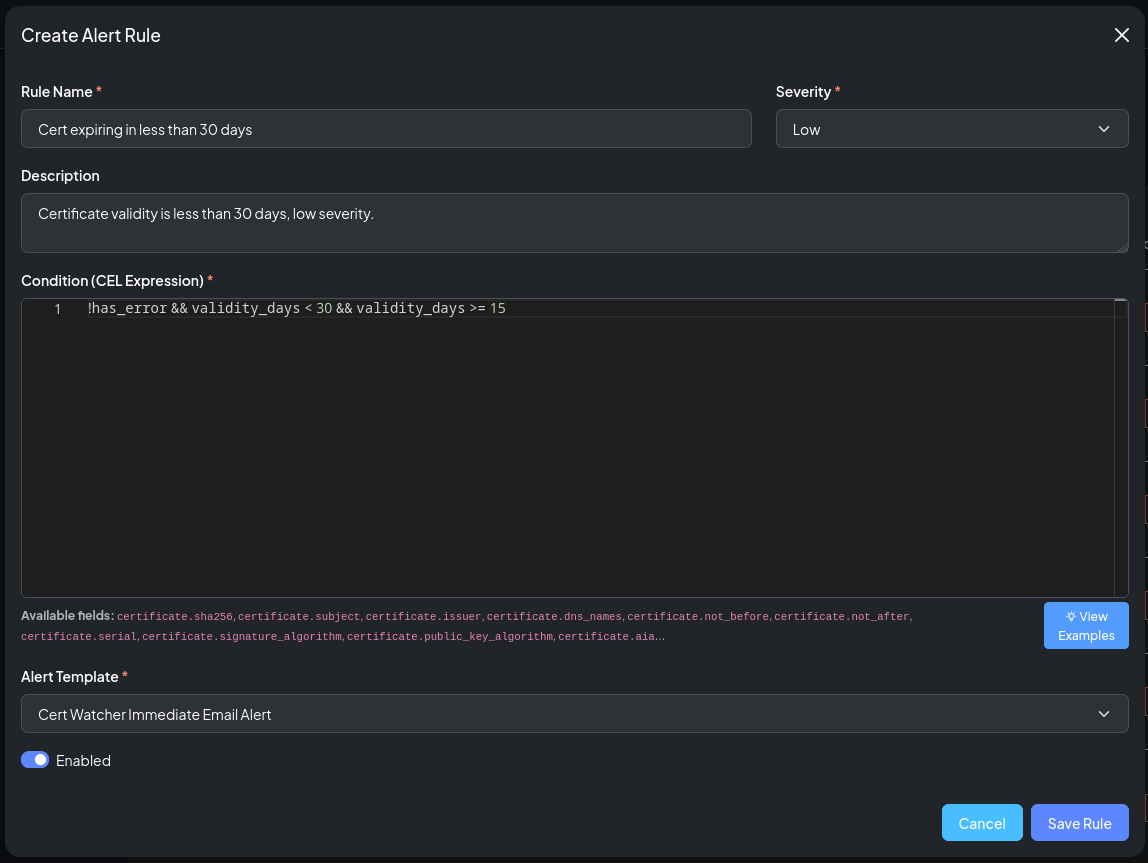
Tip
The rule editor's Available fields hint lists every variable your CEL expression can reference. See Alerting Model for a full reference.
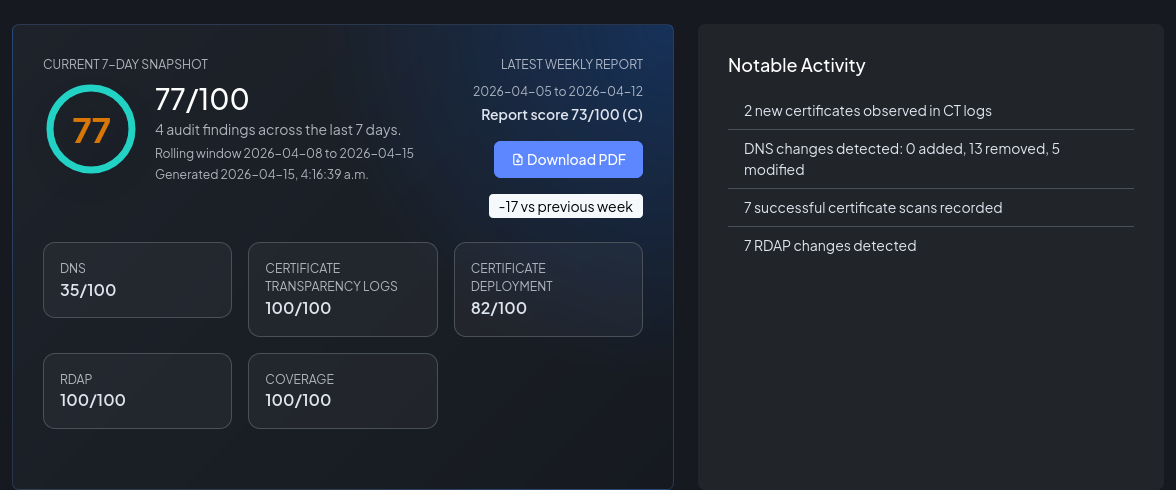
Step 8 — Review the dashboard
Return to the Dashboard. Within 24 hours of your first monitoring data arriving, the audit snapshot will begin to populate with:
- An overall score (A–F)
- Category breakdowns (CT coverage, DNS, Certificates, RDAP)
- Open findings — specific issues detected by the rule engine
- Notable activity — recent changes across all modules
What's next?
- Certificate Transparency Monitoring — in-depth guide to filters, matches, and CAA checking
- DNS Monitoring — record management, auto-discovery, and history diffs
- RDAP / WHOIS Monitoring — understanding RDAP snapshots and privacy registrars
- Certificate Deployment Monitoring — TLS scan details, cipher frameworks, and expiry alerting
- Alerting Model — full CEL reference, batch mode, and webhook payloads
- API Overview — integrate NOB.center data into your own tooling